FAQ For Clients, Post-Sales
This FAQ is aimed at managers / business owners (we call them “Org Reps”) using Chklsty.
What’s a “Checklist Blueprint”?
Checklist Blueprints are the key component of Chklsty. They’re “master versions” of a checklist. For example,
You own a small business. Your Accountant helps you make a list of the things you need to do to ensure everyone is paid the correct amount on the right date, and that all compliance requirements are met – “Payroll”. Payroll is done the same way each month – even though different people took different vacation days, each month the bookkeeper needs to count up all the vacation days. You add each step of the process to a new Checklist Blueprint, name it “Monthly Payroll” and give your Bookkeeper access to it.
It’s time for the Bookkeeper to run Payroll for this month. In Chklsty, they start a new checklist “Monthly Payroll” (a copy of the master Checklist Blueprint you made earlier), using it to prompt for each step in the process. They do the task, then mark it off as “done” on the checklist in Chklsty. They move on to the next task, do it, mark it off, and so on – same as a paper checklist. When all the tasks are complete, they sign and submit the checklist, and put it in the Payroll folder on Dropbox* for this month so all the docs are in one place.
As the business owner, you get an alert showing this job is done, and you can dig in to the details of each task if you wish. If you later notice some things weren’t done exactly how you want, you edit the Checklist Blueprint to make changes. Next month, when the bookkeeper starts the Payroll process again, the changes you made are incorporated into the new checklist the bookkeeper started.
Initially you might start with just a few Checklist Blueprints (we recommend making them for business processes that are often not done as you wish). Over time, you’ll add more – perhaps dozens or even hundreds! You’re not charged for the number of Checklist Blueprints you make.
* We say Dropbox in this example, but whatever filestore system you use – or maybe print the PDF and keep it with the other paper docs for this job.
How many “Checklist Blueprints” does Chklsty come with?
None.
While most businesses will have some jobs in common (for example, running Payroll each period), the variations between businesses, jurisdictions and payroll software packages are so great that pre-made checklists would be so generic as to not add much value.
Anyway, Chklsty is intended to be customised for your own business’ needs and unique way of doing things – that’s how you differentiate from your competitors, right? 🙂
(That being said, we are considering having a library of checklists that Chklsty clients can share in a marketplace, to share ideas and approaches. Let us know if you think that’s a good idea?).
How can import my existing checklists?
Importing an existing checklist into a new Checklist Blueprint in Chklsty is easy: use the bulk-add feature. This takes under a minute for each checklist.
This works on a per-checklist-item basis, so a typical workflow might be:
- Create a new Checklist Blueprint (see FAQ answer below)
- Click bulk add items
- A large new blank field opens up
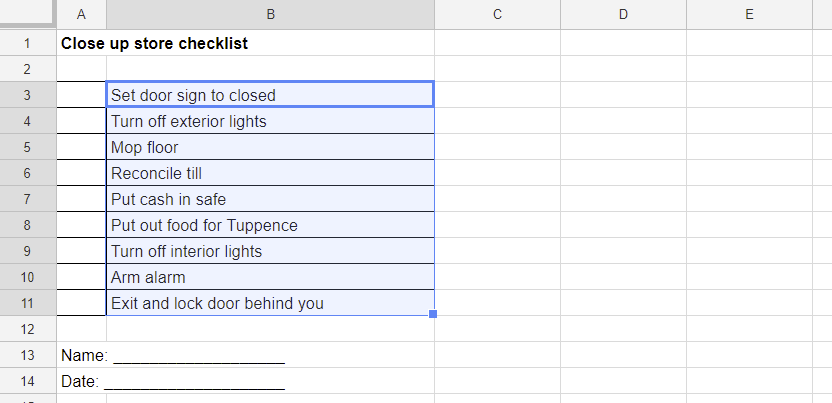
- Copy the list of items from the old checklist
- Ensure that’s one item per line. Copying from any word processor or spreadsheeting program works fine. See screenshot below.
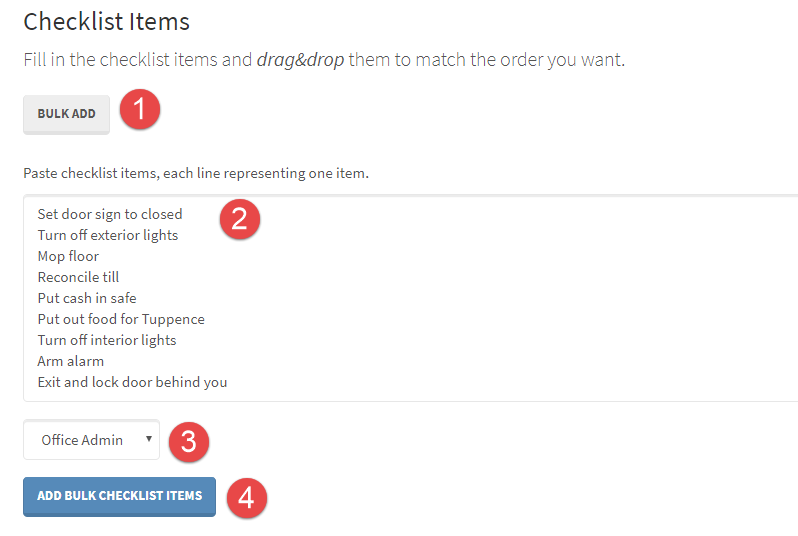
- Paste the list of items copied, in to the bulk add field. See screenshot, below.
- Select the role these items will apply to
- Each checklist item is associated with a Role in Chklsty. When bulk-adding, only one Role can be selected for all the items being added. Most simple checklists only have one Role so this is easy. More advanced checklists might have several Roles. In that case, several separate bulk-adds can work, one for all the items for each Role. Anyway, Roles can be edited later on a per-item basis.
- Click Bulk Add, to actually add them to the checklist
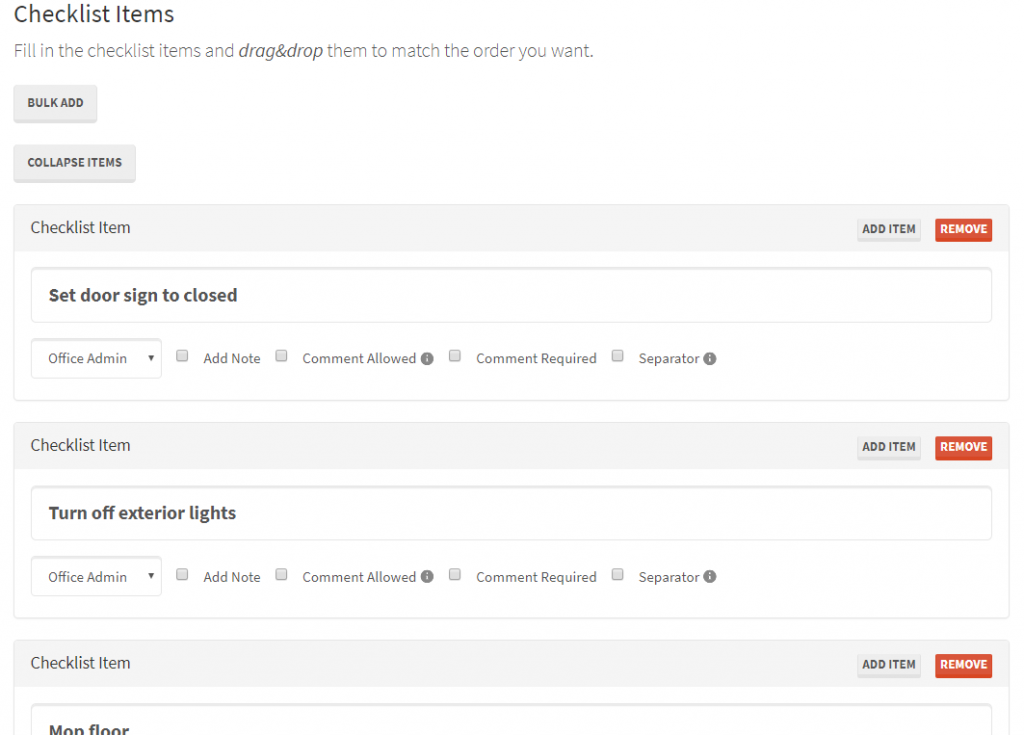
- A new checklist item is created for each line. See screenshot below.
- We recommend saving at this stage!
- As necessary, add sections and notes and preview the checklist
How do I make new Checklist Blueprint?
There’s more info on this in our First time setup Walkthrough article.
When starting out with Chklsty, there’s only one Checklist Blueprint, the example “Close up store” (as featured in our intro Explainer video). You can choose to modify or just delete this – it’s only there for you to see how a Checklist Blueprint looks (if you delete it accidentally, let us know, and we can re-add it for you).
Making new Checklist Blueprints can seem like an enormous task (especially for complex business processes), so we recommend starting out with a simpler job in your business, that happens regularly. Maybe, “First person in the office” (for example, turn on heating, brew coffee, open blinds, turn on lights, etc) for example. As you get more comfortable with how Chklsty works, you can tackle more complex business processes.
To make a new Checklist Blueprint:
- Log in to the Chklsty Dashboard (Admin → Checklists)
- Select “Add Checklist Blueprint”
- In the menu, choose “Show inline help” (it may already be on by default)
There’s extensive in-line help available on the page, but the First time Walkthrough for Owners / Managers has more detailed info and considerations.
How can I make changes to an existing Checklist Blueprint?
When starting out with Chklsty (or when making a new business process as an experienced Chklsty user), it’s likely you’ll make dozens of small edits to the Checklist Blueprint (we encourage you to ask your front line workers to make suggestions here as well. That helps with their buy-in to using checklists, and because they perform the process regularly, they will often have good ideas to improve it).
Any Checklist Blueprint can be edited at any time. Any workers who actually have that checklist open and are working through it (but have not yet submitted it) will receive a “push” notification that it has changed, with special attention drawn to the changes (completed and submitted checklists are unaffected).
To edit a Checklist Blueprint:
- Log into Chklsty Admin Dashboard
- Locate the Checklist Blueprint you need to edit
- If you have a few dozen Checklist Blueprints, the filter by name function might help
- Select the Checklist Blueprint to open it in “edit” mode
- Make the edits
- It may be helpful to turn on help-tips in the menu if you don’t do this very often. This displays practical advice on the significance of each field.
- Save and preview the changes
- Popups need to be allwoed for this to work – see below
- (Usually) make more edits!
- Save
When I go to preview a checklist blueprint, nothing happens?
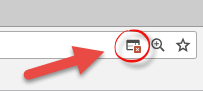
The Preview button works on a popup system. In most browsers, this needs to be explicitly allowed.
In Safari:
- From the Safari menu, choose Preferences… and click the Security tab.
- Review the Block pop-up windows option. Unchecking this option will allow pop-ups.
How do I add new Users?
Got a new employee, someone who needs to start using Chklsty the first time? You’ll need to add them as a new User. Takes around 45 seconds. Chklsty comes with a few free users, but subsequent users are charged per-User, per-month.
- Log in to the admin area of Chklsty
- Navigate to Admin, Users
- Click Add User
- Costs may apply, they’ll be shown before you’re charged
- Consider turning on contextual help for more info on each field
- Menu, Show help tips
See the First time Setup for Owners / Managers Walkthrough for a more detailed discussion of each new User field (why it’s required, how it’s used, and some practical examples).
How do I add new Roles?
Roles are tightly integrated into Chklsty. Checklists are assigned to roles, as are Users (if they do not match, a User may not be able to access a checklist they need to). Adding new and editing existing roles is easy, and there’s no charge for additional roles.
- Log in to the admin area of Chklsty
- Navigate to Admin, Roles
- Click Add Role
- Consider turning on contextual help for more info on each field
- Menu, Show help tips
See the First time Setup for Owners / Managers Walkthrough for a more detailed discussion of each new Role field (why it’s required, how it’s used, and some practical examples).
How do Header Items work?
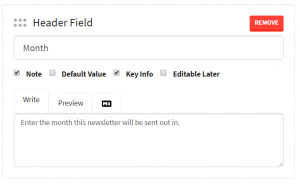
Header fields allow Users to define which workpiece this checklist is for (for example a serial number, Client ID, client name), or for reference details (for example, the month this checklist applies to). Essentially, what is unique about this piece of work, compared to another piece of work that follows the same process. For example,
- In an accounting department, the End-of-month process might have a Header Field for “Period”. The Bookkeeper would enter Aug 2018 for one month, and Sep 2018 for the next. The End-of-Month business process is the same for each month, but the figures will likely be different.
- In a warehouse, the Pick-and-pack an order process might have a header field “order number”. The storeman would enter 10001342 for one order, and 10001343 for the next order. The process for picking and packing an order is the same, even if the items in the order are different.
A Checklist Blueprint can have many Header fields, but between one and four is typical (but, no Header fields is also possible). Header fields in a Checklist Blueprint can be edited later.
The User’s name, and the checklist Start date will be automatically added to each checklist, so Header fields for those are never suitable.
The Note checkbox is for text that should appear below the header field, giving guidance to Users on the style of data to be entered in this field (for example, “Enter months as Jan, Feb, Mar, etc”).
The Default Value checkbox allows nomination of data that is pre-entered into this field, for Users to edit when starting a checklist (for example, if Client numbers are always 10 digits, but you only have hundreds of clients currently, adding seven zeros as “0000000” might be helpful here, so users just enter the last three “real” digits of the Client number). Rarely used, but there if you need it!
The Key Info checkbox affects if the data the User enters here forms part of the URL for this checklist when it is being completed. This makes URL’s be human-readable, which is handy when sharing links amongst co-workers. Every URL also has an 8-character encoded word at the end to differentiate it from other checklists (for example, “7c1edfe1”). So, an example checklist URL might be:
https://www.chklsty.com/john-smith/payroll/March-2018/b8d72a9e/
Here, “John Smith” is the user’s name, and “payroll” is the name of the checklist, added automatically. “March 2018” was added because this header field was set as being “Key Info” – it’s what differentiates this checklist completion from other instances (for example, April 2018).
By default, header items are not editable once they have been set by the User for this piece of work. The Editable Later checkbox, if checked, allows users to edit this Header Field while the checklist is being completed. For example, for a new sales enquiry, the Client ID number might not exist yet, but part of the process is to create a Client ID, so it can be added later.